Belly baskets are a must-have accessory at the moment and can be used for so many things. You can have fun customising your baskets to suit your style and tie in with your interior design scheme. They are simple to pimp up and will be a unique addition to your home. You just need a few basic items and a bit of time and patience to make your DIY belly basket decorations.
 (I’ve included some affiliate links in this post, shown with an asterisk (*). If you click on them and make a purchase, I get a bit of money in my back pocket, to help towards future creations to share with you on my blog.)
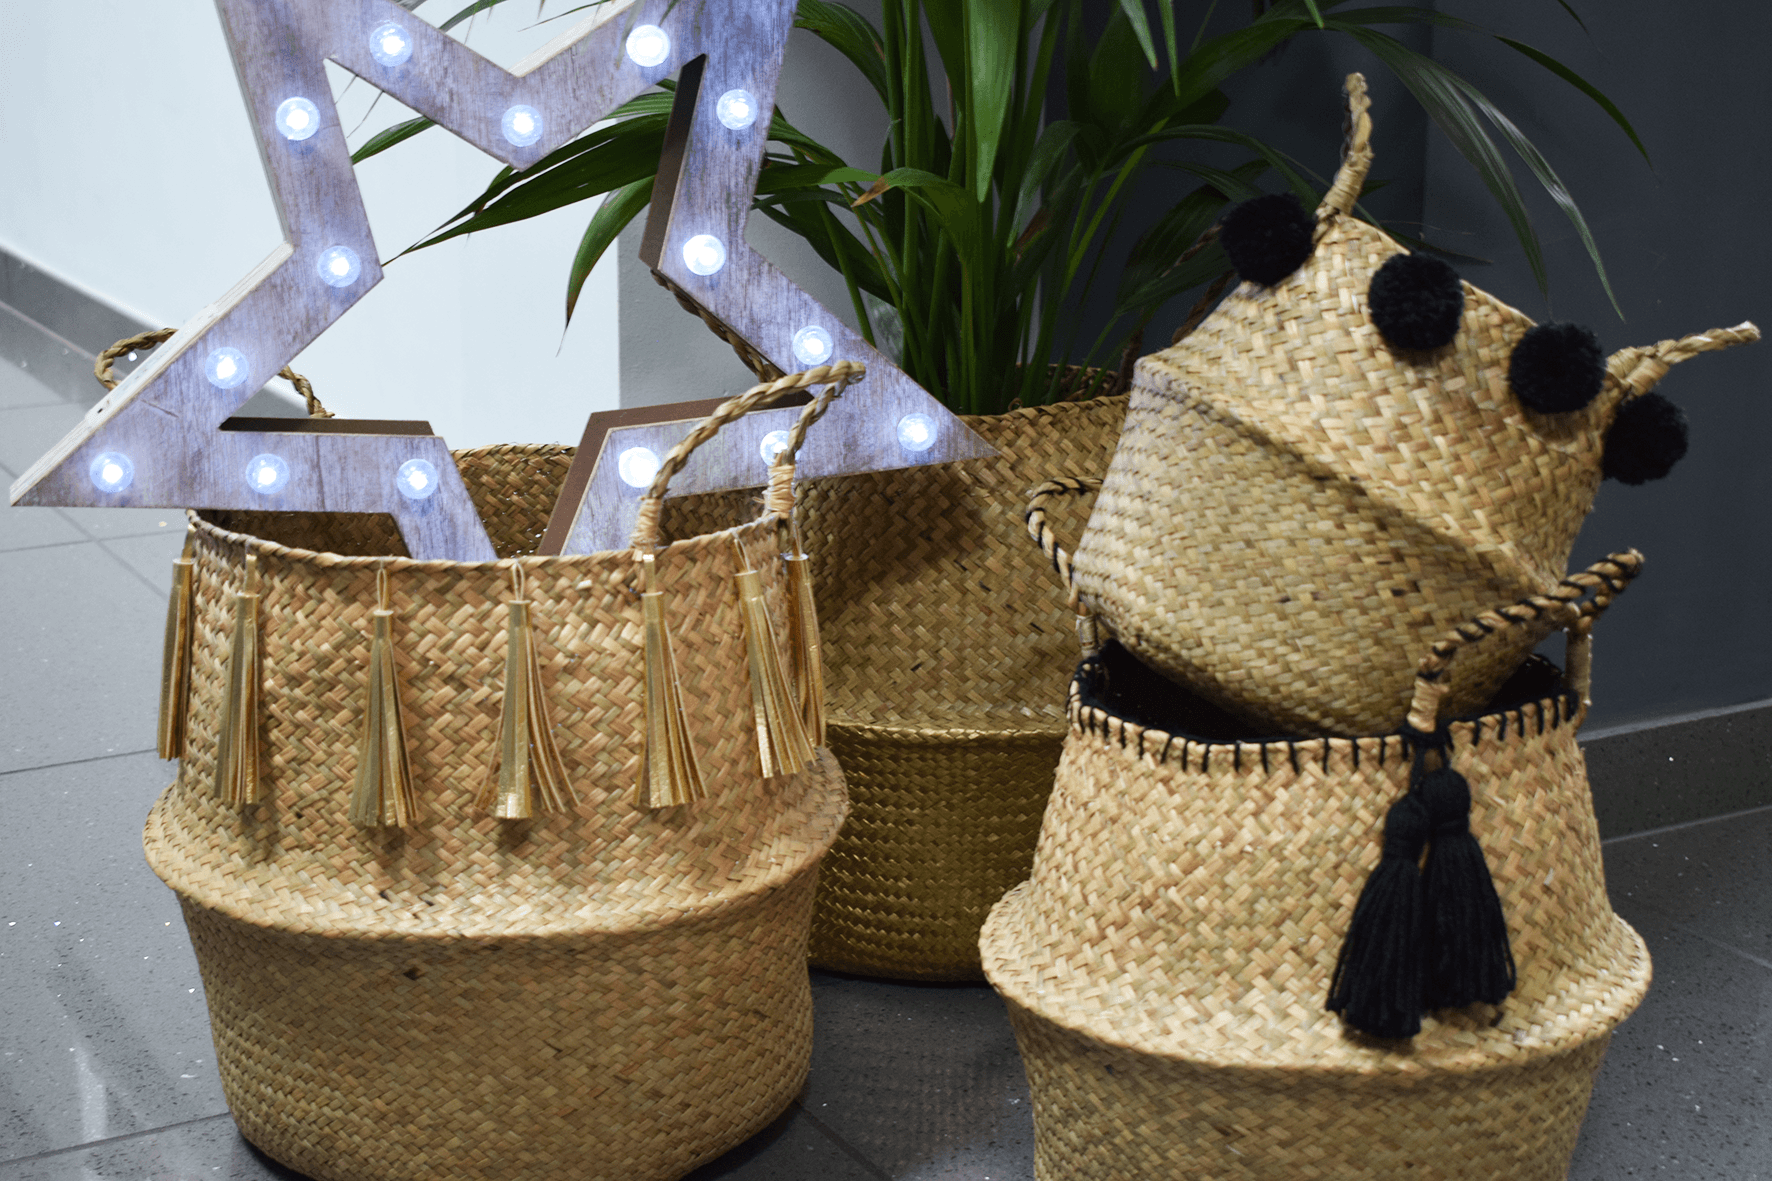
You can buy cheap plain *belly baskets from e-bay. I decorated my belly baskets 3 different ways:-
DIY Belly Basket Tassels (Method 1)
For this you will need:-
- A Basket
- Black wool (or any colour of your choice).
- A CD Case
- Scissors
First, make your tassels using your wool and CD case by following this tutorial.

Next loop them around the handle of your basket.

Before I added my tassels, to create more decor, I firstly finished the edge of the basket with blanket stitch, using the same wool and a large needle. You can see a tutorial on how to do blanket stitch here.

Then Secondly, I wrapped some wool around the handles of the basket, starting by pushing the wool through a gap with a needle and ending with a stitch.


Perfect storage for my toilet rolls!


DIY BELLY BASKET TASSELS (METHOD 2)
I also added tassels to another one of my baskets in a different way by using *gold faux leather fringing trim. There is a massive range of fringing trim you can buy to create tassels in the same way.
You will need:-
- Fringing trim
- Double-sided tape
- Scissors
- Sellotape
- Needle and thread
First cut your trim into 10cm wide pieces, times how many tassels you want to make. Then cut some single fringe pieces, and cut them in half. Add a piece of double-sided tape to the band of your trim and peel off the backing. Place one of your cut in half single fringe pieces onto your trim folded in half, as in the picture below.

Next fold the band of your trim over the loop, and then roll the band up, keeping it fairly tight.

Once you’ve rolled up the tassel, stick some Sellotape over the edge to stop it coming unravelled. I made 14 tassels to go all the way around my large belly basket.

Next stitch the tassels around your belly basket. Don’t pull the thread too tight, so the tassels are able to dangle.

Now your basket is ready to fill and display in your home.

DIY Pom Pom Belly Basket
Another great way to decorate baskets is with pom poms. This tutorial will show you three different ways to make pom poms. I used the multiple way and got unduly excited with the finished result as it took me right back to making them as a kid (this is the kind of thing we did before iPhones and tablets 😆 ). You can also buy various sized *pom pom makers.

When making the pom poms leave some length on the thread you tie it together with (as I have in the picture above), so you can use it to attach the pom pom to the basket.
Start sewing a loose stitch through your basket using cotton, not finishing it off, (as shown below) then tie the pom pom tightly into a knot through the thread loop. After you’ve done this, cut the excess length of the wool from your pom pom.

Next, pull the thread through with the needle so the pom pom is pulled up around the edge of your basket, and finish the stitch off.

Carry on attaching your pom poms until they are all the way around the top edge of your basket. I think this is my favourite one. It looks so cute.

I used my pom pom and gold tassel baskets as part of my hallway mini-makeover.

DIY Dipped Belly Basket
You can get an effective two-tone ombre look to your belly basket by painting the bottom half. I used a water based paint to give my basket a touch of glam.

Simply paint around the lower part of your basket with one or two coats of paint. I used *Plasti-Kote in Brass for a metallic gold effect. As the baskets are neutral, any colour will look fab.

Leave to dry and voila – your basket’s ready for use.

Creating your own DIY belly basket decorations will make your baskets beautiful and well as functional.


Did you enjoy this post? If so, don’t forget to share on Pinterest by clicking on the pin-it button in the top left-hand corner of any image and you can also share this post by clicking in the bottom left hand corner.


These are lush, Cara! I don’t use nearly enough baskets, but you’ve inspired me to seek some out! Sue x
So nice of you to say Sue 🙂 . Happy basket seeking! xx